Monday, November 12, 2012

Nails Tutorial: flower fun

I could not be more excited. I got a dotting tool for my nails. I know I have been using a paper clip. I really suggest getting a dotting tool. It set me back $6. It was nothing major.

Today I made flowers on my nails. I can't wait to see what else I can do.FYI flowers are so easy to make. 5 dots in a circle with space left in the middle and fill in middle of all those.

I hope you like my nails. Here is a pic :)

Tuesday, October 23, 2012

Nail tutorail: Gradient Polish

I want to start by telling the world that I have missed blogging. Really, I have missed the ability to paint my nails. The life of the college student can be so exciting! *sarcasm* All I have time for is a regular polish of one single color. It really is sad when you compare it to all the fun things I used to do. Great way to stifle my creativity. Thanks college!

Well, now I found myself with free time to do my nails and blog! It's like a Halloween miracle :) Here is a very simple tutorial on how to do a gradient polish. It is fast and easy. It's perfect for that college kid on the go.

1. Grab the polish you will want to use. I grabbed OPI DS Coronation. It is an amazing glitter polish.
2. Paint your first coat over your whole nail.
3. Start the next coat a quarter of the way down and go to the end.
4. Continue these steps starting in the middle and three quarters of the way until the end.

These steps are easy. They will also leave you with a finished product. I am looking forward to seeing if these tricks work with a colored polish. I hope you enjoyed this blog. I sure have missed it!

Nail'd it. ;)


Love,
Ally Norm

Wednesday, August 29, 2012

A fresh start: Guide to cleaning make up brushes

A fresh start...This applies for two reasons. One, today is my first day of my last year of college. It is exciting and a little nerve-wracking at the same time. Two, this blog will give your make up brushes an amazing fresh start.

Alright, here we go! Hope you're looking forward to the tutorial. It's rather simple really. You have some dirty make up brushes, and they need a good refresher. You are going to need three ingredients.

1. 1 cup of Hot water
2. 1 tbsp of dish soap
3. 1 tbsp of white vinegar

Mix all three of these together. I used dawn soap so my mix was a pretty light blue color. After that is mixed, dip your brush in and give it a swirl in the mixture. You will see the color change as it's cleaning off the brushes. When you are done rinse them off with water and leave them to dry.

This was the first time I've cleaned my brushes. That is really bad. I know ypu don't need to lecture me. The mixture was really gross that was a good enough scolding for me. I will say, I always wanted to clean them. I never wanted to pay for a solution, though. This is a great, cheap option while on a college budget. Did I mention it left my brushes SUPER soft :)

Below is a photo of before and after using Pic Stitch. Notice in the before the small brush is brown. In the after photo it is white. I literally had no idea that was the original color...oops!

Thank you all for reading!

Love,
Ally Norm

Monday, August 27, 2012

Nail Tutorial: French Manicure

My past nail blogs I have talked about wanting my polish to last as long as they do in the salons. Well, I got that down :) This time I went from a salon type polish. I did my very own french manicure. I will no longer need to go to the salon. Keep in mind I don't like getting fake nails. My nails are already too fragile.

Doing a french tip was very easy. I took my white nail polish and painted the tips. Do not paint too far up the nail. The next step is to shape the polish. I am a college student. I use what is on hand. Q tips were my go to choice. I would love to have the polish brushes that salons have. One day I'll purchase one.

Now you're left with a shaped tip. Just think of all the possibilities you can do with this. All the color possibilities :) I used a pale pink glitter all over my nail. I then added a top coat. I am really happy with how it turned out. I looks like I just stepped out of the salon.

\

Nail'd It

Love,
Ally Norm

Monday, August 20, 2012

Nail Tutorial: Fishtail

Doing your nails is something that patience. Today I did the fishtail method for painting my nails. Now, I can't do hair. The closest thing I can do to my hair is a plain simple braid. So, I tried it with my nails.

There isn't much to this. You just cross colors over your nails. I used Orly "Jealous, much," Sally Hansen "White on" and Ulta's "Tutu cute." This is a VERY long process. I only did it on one nail. I'm glad I skipped the other nails.


I learned one great thing about doing my nails today. That is if you touch your nail before it's dry wet your finger and rub on that spot in a circular motion. It gets rid of the mess that you just made.

Do you have any questions about nail polish or anything please ask!

Now, onto something else I'm excited to blog about. I have been running lately. My grandma walks. My dad bikes. My boyfriend swims. Everyone has their thing. I would love to run on the treadmill when I went to the gym. I really should have done track when I was in high school.

My first run was 13.22
My second run was 11.46

My goal is to cut my first time in half! Help keep me motivated. I would love to hear good running songs that you may have!

Thursday, August 16, 2012

PR's Buzzn: Start Up

I recently got an internship with Wolverine Solutions Inc. They launched an app called Buzzn. The app is currently offered for iPhones and will be on the android market soon.

Let me tell you a bit about the app first. I really like it. I think it is a great idea. The app allows you to share your social and academic calendars with your friends. First you create an account, add courses you are taking and events (work, meetings or social events) then you can add your friends. You can see your friends courses and events and vice versa. This makes planning around the busy college schedules sooo much easier. Here is a photo from Pic Stitch showing what Buzzn looks like.


These posts will be about things I did Buzzn or things I learned while working for them.

One thing that I've learned is people will sometimes have unrealistic expectations. I am evaluated based on how many downloads I generate for the app. My boss's boss was expecting the app to TAKE OFF right at launch. As much as I would love to see that from the app, sadly it is not realistic. For one thing, we haven't even started school yet. This makes promoting the app only possible for me over social media. I don't mind this really. I love social media. It is not the most effective way to generate downloads.

My current promotion is being done on the computer. Last night I sent out emails to roughly 100 student organizations on campus at Wayne State. I post on twitter and share Buzzn's information on Facebook. If you're reading this and you are a Wayne State student download this application! Also, please friend me (Allison Normand).

Thanks y'all

Love,
Ally Norm

Monday, August 13, 2012

Nail Tutorial: Spackle

It's my favorite day of the week. That would be Monday. It's time to do my nails :)

First I want to start with saying thank you all that have been reading my blog! I really loved seeing the numbers jump from the last time I had checked. I started this blog not thinking I was going to get as many views. I have to thank Pinterest/Twitter for getting me out there. I hope you like what you see and continue to read.

Now, back to the nails. I have said in posts before that I wanted to make my polish last longer. I am so happy to say that from my last blog post my Orly color did not chip AT ALL. I went a whole week without ANY chipping. As woman we know this is basically a miracle unless you get them professionally done. Well, I finally did it on my own :)

This week I decided to go for a sort of spackle technique. It's a very simple tutorial.

Step one: Paint your nails with the color of your choosing. I used Orly Purple Crush. I now LOVEEE this brand, as well as this color.

Step two: Get a sandwich bag and crinkle it up. Put polish on the bag. I used OPI Lincoln Park after Dark. Everyone needs to own this color. It really is the best. By the way, my grandma calls it "ohh-pie." I just can't bring myself to tell her that isn't the brand name.

Step three: Dab polish onto your nail. It's that easy.

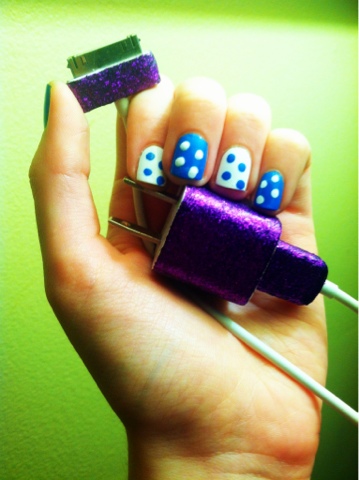
This can get a bit messy. The photo is what I mean by messy. I know that it will come off in the shower tomorrow. That is one thing I love about painting my nails and then showering.


I've becoming known in my family for my great nail techniques. My grandma made me use the Sally Hansen nail strips on her nails. They are supposed to last up to 10 days. Hers lasted four days. They were nice enough to send her a free set. Here are what her nails look like now! The design is really cool.


That is all for now. I will be glittering shoes on Wednesday. Keep an eye out :)

Love,
Ally Norm


Monday, August 6, 2012

Nail Tutorial: Tips and Tricks

As a woman on the go, you need to do your nails in a hurry. I just recently read in Allure magazine that you should wait 25 minutes for your nails to dry. Who has that kind of time nowadays? It doesn't matter whether you're in college, a full-time job or a stay-at-home mom. We are busy women.

This blog is going to give you a few simple tricks to make your nails look great.

Trick number one: Push back your cuticles.
This is a trick that will make your manicure look better. This way the nail polish will adhere to the nail. When you polish over the cuticles the polish doesn't look smooth. I apply cuticle oil first and then push back the cuticles.

Trick number two: How to remove ripples from you nails.
Ever in a hurry to see if your nails are dry? You touch the nail and presto you can see a great finger print. There is an easy way to remove that. Go grab your nail polish remover. Put a little nail polish remover on the pad of your finger. Use slow, circular motions over the messed up area. That should cure the mishap. After you are done, apply a top coat.

Trick number three: How to remove the nicks you get.
You can remove nicks similar to the way you get rid of ripples. The only difference to this is first apply a dash of polish over the nick. Rub around the polish to even out the layers and add a top coat.

I just bought some Orly nail polish. This is the first time I used this brand. I really liked it. Here is what three coats of Jealous, Much? looks like. I love the sea foam color.

Love,
Ally Norm

Wednesday, August 1, 2012

Hiatus: Coast Guard weekend

Today is usually the day I get my craft on. I am taking a small hiatus.

I am getting ready to take a mini vacation. I leave tomorrow for Grand Haven, MI, and I come back Sunday. I am really excited. My boyfriend will get to meet my mother and stepfather. He will also get to experience one of the best weekends at Grand Haven. That would be Coast Guard weekend.

We will fill our time with carnival rides, craft shows, walks on the beach/pier and fireworks. I am really looking forward to this weekend. I am excited to see all the cool things on sale at the craft show. I know I will be buying a glass nail file! Who knows what else.

I hope that I can bring back some inspiration for my blog. I plan to take pictures. Maybe you readers will be lucky enough to see them.

I'd love to hear comments on if you tried something...Let's be friends y'all :) Did it work? yay or nay? Do you like what you see? Do you want to see pics of Coast Guard :)

Love,
Ally Norm

Monday, July 30, 2012

Nail tutorial: How to Hearts

Mondays mean it is time for manicures. It is MANICURE MONDAY. This really is my favorite day of the week. The day where I try out all the great nail ideas that I find on Pinterest. I'm getting better at painting my nails. It really is a process to paint my nails.

I always make sure to push back the cuticles. This really is a good step to make your manicure better. I picked two OPI colors. Color number one is conquistadorable color and the second color is DS coronation. The DS color is one of the best glitters I've used. It takes several coats but it goes on nicely.

Making a heart on your nails is actually really easy. All you do is make three dots on your nail and connect them with the polish. As I have said the past few times I've done my nails I do not use a dotting tool. I just use the end of a paper clip. I think a dotting tool will be my next purchase.

Here is a little photo to show you how to make the hearts. It's on glossy paper so doesn't look too great.


That is all I had to do for my nails this week. It was simple and easy. I hope you learned something today. I'd sure love to see some comments if you're out there reading this! Another Pinterest manicure Nail'd it.


Love,
Ally Norm

Wednesday, July 25, 2012

Glitter iPhone charger: A little glitter in your day

In my last craft post I showed how you can wrap your headphones in embroidery floss to make them original. This post is all about making your phone charger more original. It is really easy to do and makes a small amount of time.

Things you will need:
-Phone charger
-Glitter
-Mod podge
-Clear acrylic sealer
-Paint brush
-Mixing bowl
-Tape

This whole tutorial is rather simple.
1. Mix together your glitter and mod podge. I bought extra fine glitter. You can do this with any loose glitter. Also, I mixed it in a sour cream container. I'm really glad that I did or else I would have ruined a nice bowl. My dad would NOT have liked that.


2. Simply use the paint brush to paint on the glitter.It takes a couple of coats so just apply until you're happy. When I glittered the cord I made sure to tape the plug parts so that I didn't get glitter on it and mess things up.

3. After all is dry add a coat of acrylic sealer. BOOM you're done!


I love the way mine turned out. Everyone at my work loved it. My best friend also asked me to do this to her charger. Now I spend my days thinking of everything else I can apply glitter to that is in my house. This really could get bad! Glitter iPhone charger - Nail'd it

Love,
Ally Norm

Monday, July 23, 2012

Nail tutorial: Lots'a dots

This manicure Monday involved dots. I used two different colors that were Sally Hansen's White On and OPIs Orge-the-Top Blue. Orge-the-Top Blue goes on so nicely. It takes two solid coats, and it looks great. Plus, I just love all the names for the OPI colors. This one was from the Shrek collection.

I painted my nails alternating colors. Then with the opposite color added dots. It really is that simple. I do not have a dotting tool for my nails. I really do need to invest in one. Right now I just use the end of a paper clip in order to make the dots.


I have a lot of patience when it comes to doing my nails. I love hearing when people tell me they like my nails, and I can respond, "Thanks I did them myself." I got that a lot with the cheetah nails I blogged about last week.

Stay tune for Wednesday when I will have a tutorial on how to glitter just about anything :) All girls love glitter (hyperbole?)

So, I bid you ado. Nail'd it

Love,
Ally Norm

Wednesday, July 18, 2012

Wrapped headphones: Headphone flossin'

In one of my last post I spoke of my love for friendship bracelets. Embroidery floss has many other uses. This one is like a mix of my love for friendship bracelets and my iPhone headphones. I'm sure everyone that has a pair of headphones knows just how annoying they can be. Before you put them away, you make sure they are nicely rolled up. The second that you put them in your pocket, purse or etc. they become a jumbled mess.

There is a solution to this problem. You simply have to wrap your headphones with embroidery floss. The best part of this is that it is the same way to make a friendship bracelet. The bracelet is called the spiral bracelet or the Chinese staircase.

(1) Start off by gathering your headphones and the floss colors you would like. I picked five colors. (2) Tie the floss to the headphone right below the headphone jack. Make sure the headphone jack is pointing away from you. (3) Hold on to the headphone cord. (4) Use the floss to make a 4. (5) Pull the thread through the loop. Make sure you pull it tight. (6) Continue this process until you have covered all the cord.

Wrapping your headphones takes a ton of time to do. The end result is really worth it though. Your headphones will no longer tangle when you put them in your pocket. Also, your headphones will look really cool and colorful. All of my friends always ask me to wrap their headphones. Here is what my headphones look like!


There is also another way to wrap headphones with perler beads. This way is very easy. You just cut the beads and pop them onto the headphones. This may take less time than wrapping them with floss. It is going to take more beads though.

Another one for the books. Nail'd it

Love,
Ally Norm


Monday, July 16, 2012

Nail tutorial: Don't be a cheetah

Mondays mean it's time for me to do my nails. I like to do my nails every week. I can't stand it when my nails start to chip :( This just brings me back to saying I wish that I could paint my nails and have it stay chip-free like they do at nail salons. However, I do love to do my nails. I will use any excuse to paint them often. So, in the end, I guess this works out.

Animal print is all the rage. This is why I decided to paint my nails cheetah print. I found some great tutorials off of The Beauty Department and The Polished Medic. Cheetah print is great because you can never paint each nail the same. Plus there are so many different color varieties to choose from. You can keep the print classic or colorful.

For my cheetah print nails I used OPI cover me in petals as the base coat, OPI bling dynasty for the cheetah spots and OPI what's a tire jack? for the spots. If you couldn't tell I have a love for OPI polish. The only polishes that I have are not OPI have been purchased for me.

Step one: Paint your nails all over with one color
Step two: Wait for your base coat to dry
Step three: Use a dotting tool to create spots. I used the a paper clip (done in bling dynasty).
Step four: Wait for dots to dry
Step five: Create half circles around each dot.

When creating the cheetah print not all dots need to be 'spot on.' The fun with this is that some dots can be larger, smaller, more oval and etc. If I had extra room on my nails I just simply added some spots in black. The final step was to add a top coat after all was dry.

I like to say I've Nail'd it.


Love,
Ally Norm


Friday, July 13, 2012

Field day Friday: Get it Taco Bell

I read this article today off of PR Daily. It just goes to show that some companies should not be messed with on Twitter. Taco Bell vs. Old Spice

I would say this is a job well done from Taco Bell. They were able to catch what Old Spice said about them on Twitter and respond back. Their response was very witty as well. I give kudos to the social media team that responded.

Taco Bell's response happened within 30 minutes of Old Spice's tweet. Neither tweet has been taken down. I am interested to see if Old Spice has anything to say. They called Taco Bell out for false advertising. This may have just back fired in their faces.

Taco Bell you have Nail'd it!

Love,
Ally Norm

Wednesday, July 11, 2012

Perler bowls and coasters:

Ever since I was a little kid perler beads were so much fun to play with. I loved making so many different things. As I got older, I stopped playing so much with perler beads and got into other crafts. (It was probably friendship bracelet making.) This left me with a ton of left over beads. I found a great craft to do with all of these left over beads. That would be to make bowls out of them.

Things you will need:
-perler beads
-oven safe bowl/dish
-cooking spray
-oven

The first step is to spray the dish with cooking spray. This helps so you can remove the bowl at the end. This also helps for the perler beads to stick to the bowl better. You need to have a single layer of the beads along the bowl. You can put the beads up as far as you like.

Once this is done preheat your oven to 350 degrees. Place the dish in the oven. Then you cook the bowls for 15 minutes or until they are fully melted at the tops.

I use a muffin tin to make my bowls. My boyfriend always gets some of the things I make. I made him a bowl with his fraternity colors, which are purple and gold. Here is a photo of what my finish product turned out like.  


I have also gone the traditional route the perler beads. I made a housewarming gift for one of my friends. I was inspired by a Tiffany's box. Here is what the coasters turned out like.


Monday, July 9, 2012

Nail tutorial: Remove that polish!

I love Pinterest for so many reasons. One of them would be this great way to remove your nail polish. I figured that I would share that with those reading :) This trick only uses one cotton ball and minimal time and effort.

The first step is to take a cotton ball and un-roll it. When the cotton ball is un-rolled it will look like the bottom piece of the photo. The next step is to rip the cotton ball in half. Then it will look like the top piece. The next move is to tear the cotton ball into strips. You will need ten small strips to cover all the nails. 


When you have all ten strips fill the lid of the nail polish remover. Dip the polish into the remover. Make sure that you do not dip the cotton strip in too much. If you get them too wet your whole hand will be soaking with nail polish remover. This is just a little photo of what your nails will look like with the cotton swabs on. If the cotton swabs are too long for the nail I fold it up.


After 2 minutes you can remove the cotton swabs. You can do this with the left over pieces from ripping the strips. You have to apply some force when you are removing the cotton swabs. It will not take all the polish off but it will remove enough. I use the left over piece to remove the left over nail polish. It already has nail polish remover on it so it makes it easier.

I hope that this trick helps. I know I won't be going back to the old way of taking polish off anytime soon. Whoever came up with this idea is a real genius. Someone that all us women should thank!

Wednesday, July 4, 2012

Friendship bracelets: Knot your average friendship

Friendship bracelets are one of my favorite crafts. Ever since I was little I have been making friendship bracelets. Last summer my best friend and I decided to start making them again. It started off with making one or two bracelets until I had the above photo.

I have made friendship bracelets for my boyfriend, my best friends, my co-workers, my grandma and my littles in the sorority. One of my littles has needed at least 4 bracelets. Hers keep falling off. Why is beyond me. Mine always stay on for so long!

Last summer I was so into friendship bracelet making that I had practically everyone at my work making them. It's very easy to do when your job is slow. Sadly, sometimes it was a waste of string when they couldn't get it right.

I have even sold some of my friendship bracelet creations. That just makes me happy :) I wish I had the free time to make a bunch and sell them in a craft show. Until then, if you have your eye on one of these beauties let me know. I take requests ;)

Love,
Ally Norm

Tuesday, July 3, 2012

Nail tutorial: Iron Man nails

It's amazing all the things you can do with your nails by yourself. I'm not a huge fan of getting my nails professionally done when I can paint them myself. One day I'll figure out how they get the polish to last for so long. Of course pinterest inspired a new nail idea. I had a party to go to on Saturday. It was an American themed party. I decided since most people would be in a costume I would rock my flapper dress I bought for halloween a couple of years ago. The dress is red with gold accents. I wanted my nails to match. I picked my two favorite OPI colors, Bling Dynasty and The Thrill of Brazil. 
 
All you need to do to get the stripe on your nails is add tape. I usually use masking tape. I don't know if it really works better or if my mind just tells me that it does. The trick to the tape is making sure that when you pull it off the polish is still slightly wet, and you do it slowly. I've found that even if the polish pulls up a bit when you take off the tape it's nothing a top coat can't fix. I am not a huge fan of the OPI top coat that I have :( it's so thick that it makes my nail polish bubble EVERY time. I went out and bought a Sally top coat. It was cheaper compared to OPI. Plus, you cant seem to go wrong with a bottle of Sally.
 
Here is the final product. This was take two... I wanted the stripe to be really thin. My first round it came out thick. So, after take two I've said I Nail'd it :) After looking at it I came to the conclusion my nails look kind of like Iron Man. It's just kind of perfect with the Avengers coming out like a month or so ago.

Love,
Ally Norm


Thursday, June 28, 2012

New to the Blog World

When you want to start a blog I assume you ask yourself one question. What should my blog be about? I've been asking myself this question for awhile now. There are people out there that are very passionate about the things that they do. I was always secretly jealous. One day it hit me. It's very clear to me I'm passionate about two things. Those two things are crafts and nails.

I have been doing crafts ever since I was a little kid. I have my mother to thank for this. She still has a craft room in the basement. She always jokes around saying one day I'll need a room just like she does. We both know this will be true though. I have already started to take up a nice corner in the basement at my Dad's house.

As a college student, I have found a great place to let my creative side show. One place is my major as a public relations student. This gives me the abiltiy to be creative in my writing. It also allows me to come up with fun ways to pitch things. My second way is my sorority. I am a proud member of Kappa Delta Sorority. I just recently went alum (let's not talk about it, because I get sad).

My second passion that I mentioned was nails. I love finding cool and fun ways to paint my nails. The only place I really have patience is when I paint my nails. Another great reason I love painting my nails is because this is the one place where I can express my creative side on my person. I'm not into the crazy make-up or body full of tattoos thing.

Now that I've found what I'm passionate about it is time to put this to the test. It is time I finally wrote a blog. I don't really mind of people don't read this. I don't really mind if I become as great as the mommy bloggers out there. I don't need a fantastic coming out party for my blog. I'm doing this for me :) If you are reading this thank you!

Love,
Ally Norm